booleansplit.com

photos, tips, tricks, and thoughts from an avid amateur photographer


Archive for Tips & Tricks

Pentax K10D Lightroom custom develop settings

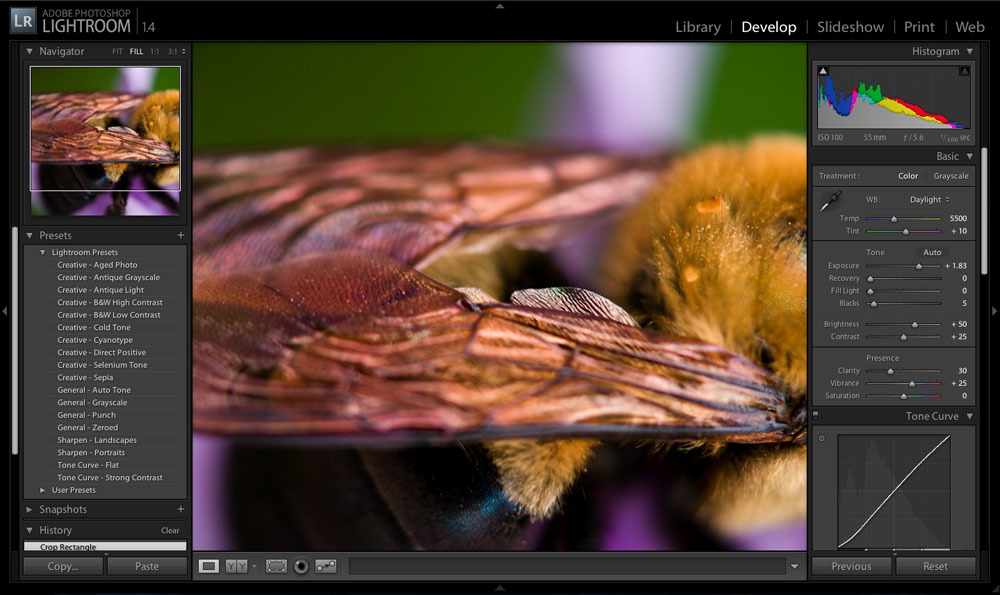
lr_large_screenshot

After shooting digital for 10 years I finally started shooting RAW exclusively in September 2008. What took me so long? Probably the same thing that keeps most amateur photographers from shooting RAW: the added time and complexity of post-processing RAW images. That all changed when I discovered Adobe Photoshop Lightroom’s customizable default development settings. By creating a custom set of image adjustments I get Lightroom to do most of the work for me as I import my images. I often refer to my “default import settings” in my blog posts so I figured I should share what those settings are. Here are the settings that I have found that work best for me and my Pentax K10D in Lightroom v1.4 and make shooting RAW work so well for me: More »

’round back

'round back

Pentax K10D, Pentax SMC-A 50mm f/1.7 (manual focus), ISO 100, f/8, 30 sec, +/-0 EV, IS off

Taken in an alley behind an apartment building on Historic Highland Avenue in Birmingham, AL. I was drawn to the combination of lighting (sodium vapor and mercury vapor), the texture of the brick and the arrangement of the trash cans. This photo was taken with my Pentax K10D and my old manual focus 50mm f/1.7 lens on a Joby Gorillapod. I set the camera to manual mode, selected ISO 100 (for minimum noise), Auto white balance, 30 second shutter (maximum shutter time in manual mode), f/8 aperture (for maximum sharpness), and set the self timer to the 2 second delay position (to eliminate camera shake when the shutter opens). I manually set the focus at infinity and didn’t bother checking the light meter reading. Since I shoot these shots with the long exposure noise reduction turned off, I was able to review the shot immediately and saw that it was good on the first try. The alley was a lot darker and creepier than this photo suggests so after one shot I grabbed up my camera and kept moving… More »

Pentax K10D RAW noise reduction

I shoot a lot of long exposure shots with my Pentax K10D. One of my pet peeves is waiting for the built-in noise reduction to take a 1:1 dark frame subtraction exposure. This ends up doubling the length of time for each shot. Not that big of a deal if you are shooting 1 second exposures but a bit of a PITA if you’re shooting 5 minute bulb shots.

In-camera noise reduction is pretty critical for shooting JPEGs. Sure, you can always shoot your own series of dark frames at different ISOs and use them with 3rd party software to remove hot spots, etc. but this seems a bit extreme. So, I have just left the in-camera NR on and lived with the dark frame subtraction double exposure.

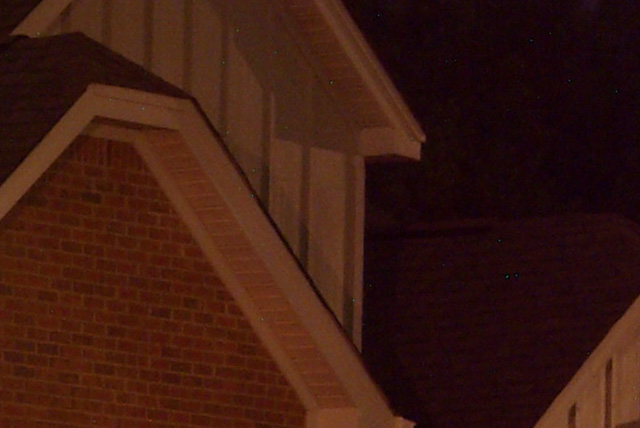
Many times I’ve noticed that there are hot spots in the initial Adobe Lightroom previews of my long exposure RAW files that disappear the first time I zoom in to 100%. This got me to thinking that maybe Lightroom could take care of long exposure noise on its own without the camera’s help. After searching Google in vain for a definitive answer, I decided a quick test was in order. I was pleased to learn that, now that I am shooting exclusively in RAW, I can turn off the in-camera noise reduction on my K10D and eliminate the wait between long exposure shots. (In-camera NR is still recommended for JPEG shooting).

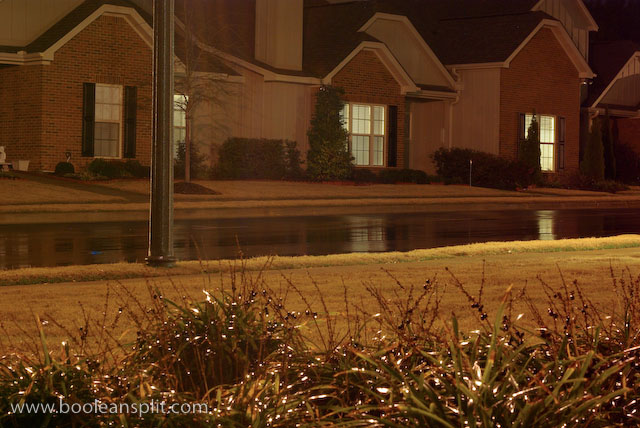
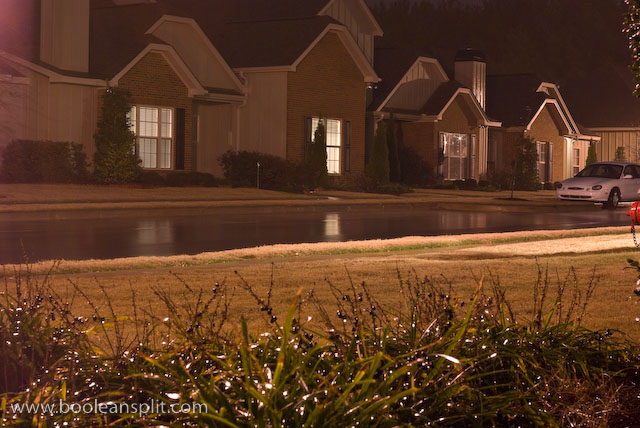
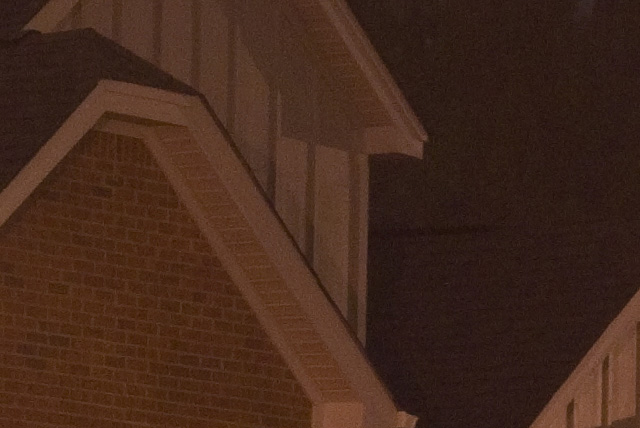
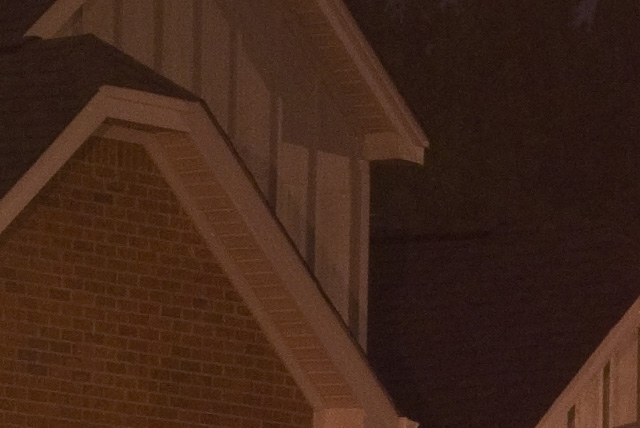
Here’s what I found in the test. All shots are 30 seconds at f/16 and ISO 400 using my 50mm f/1.7 SMC-A lens with only LR’s default processing applied. Sorry for the crude composition…

JPEG with NR OFF

JPEG with NR OFF

100% crop of JPEG w/ NR OFF

100% crop of JPEG w/ NR OFF

RAW with NR ON

RAW with NR ON

100% crop of RAW w/ NR ON

100% crop of RAW w/ NR ON

RAW with NR OFF

RAW with NR OFF

100% crop of RAW w/ NR OFF

100% crop of RAW w/ NR OFF

From what I could tell from this test, there is virtually no difference in noise between the RAW images with and without in-camera noise reduction. In fact, to me the images without the NR has slightly better contrast and more shadow detail. Keep in mind that these are unprocessed RAW files so I could easily get similar contrast and saturation as the JPEG image while maintaining the greater detail and dynamic range of the RAW images.

holiday parade photography tips

digital-photography-school.com just posted a great guide to taking pictures at all those parades that are so popular this time of year. My favorite tip is to shoot the crowd reactions. My best shots from these types of events are always of the spectators and not the activity itself.

The only thing missing is any mention of what to do for night parades. A lot of Christmas parades are at night with the only lighting coming from the holiday decorations. Here a fast lens (f/2.8 or better) is a must have. Also, shooting wider angle shots can help reduce motion blur at slower shutter speeds. It goes without saying that you will have to bump your ISO up to get hand-holdable shutter speeds. Finally, don’t be afraid to brace up against a light pole and get some long exposure motion blurred shots!

Christmas table centerpiece photo

Christmas centerpiece arrangement

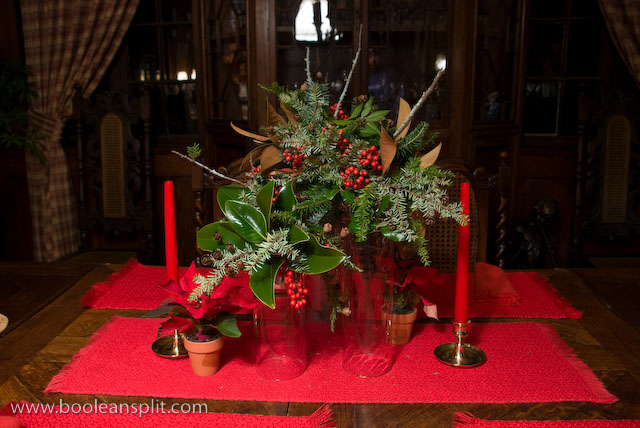
My father in-law asked me to take a picture of his Christmas table centerpiece arrangement so he could e-mail it to an out of town friend. My attempt at a quick snapshot didn’t meet my with my photographic standards so I spent the next hour playing with lighting to get the final shot above. This was a very challenging shot as I had to make do with what lighting I could find in the house. Here’s how I did it:

first shot with ambient light only

First of all, my in-laws’ house is DARK. Dark walls. Dark floors. Dark furniture. Dark lamps. You get the idea. Plus, it was night so the wall of windows to the left of the subject weren’t helping. Of course, I could have waited for morning but I always like a good challenge. Plus, I figured that if I got it right, a night shot would better capture the elegant and rich warmth of the table setting.

My first test shot was attampted with nothing but the incandescent  lamp light filtering in from the living room behind the camera. This required a 6 second exposure at f/8 and ISO 400 (a tripod was used so my K10D’s IS was OFF). I used f/8 to ensure that the entire arrangement was in sharp focus while the background was blurred a bit. I like the f/8 shot because there is enough background detail to clearly place this shot in my in-laws dining room while the subject focus was nicely isolated. The lighting in this first shot was too flat. I wanted more subject isolation so I grabbed a floor lamp and placed it to the left of the camera and tried again:
second shot w/ floor lamp at eye level

set-up for second shot

This set-up provided better subject isolation via lighting but the shadows seemed a bit harsh. I played around with a few combinations of settings and finally settled on 4 seconds at f/8 and ISO 100 but was still not happy with the results.

Recalling some studio shots that I did not long ago where I held a shaded lamp directly above my subjects, I decided to try holding the lamp above the centerpiece just out of the frame. I also turned off all the lights in the living room and opened the glass doors on the china cabinet behind the arrangement to eliminate the reflection of the lamp. Finally, I lit the candles to add another level of detail and ambiance to the shot.
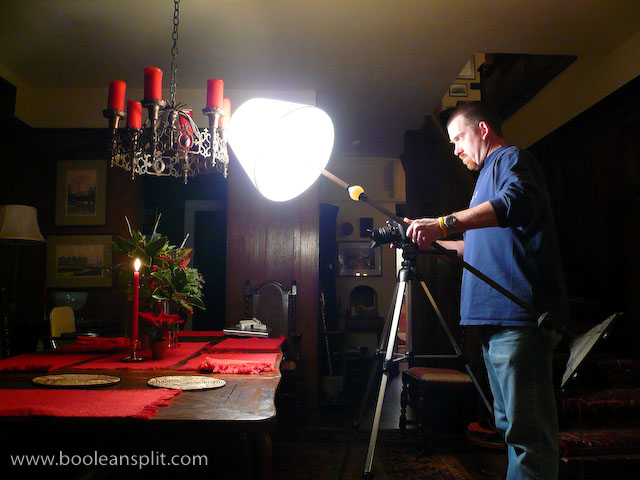
set-up for final shot

This set-up is what I used for the final shot. (Note use of lens hood to quell flare). I sped up the ISO to 200 to get a 1.6 second exposure at f/8. This was mainly because the lamp was a bit heavy to be holding up like this for 6 seconds but also because a shorter exposure helped cut down on the ambient light bleeding in to the background. While the shutter was open I slowly arced the lamp from left to right to paint the entire arrangement and blur the shadows. The resulting image (top) ended up with shadows that were much softer at the subject with a nice gradual fall off of the light into the background. I couldn’t have done much better with an actual soft box in a studio ;-)

With a nice looking exposure I pulled the image into Lightroom to adjust the white balance (2625K) and apply my standard Sharpness (14), Detail (51), Clarity (30), and Vibrance (+25) settings. I also pushed the Recovery up to 73 to help correct some over exposure of the reds and knock back the highlights on the shiny green leaves a bit. A bit of final cropping (always leave room for cropping!) and off the image went to my father in-law.

About

I'm an industrial designer and an avid hobbyist photographer. People are always asking me "how'd you do that?" So, I decided to create this site as a place to share my experiences and insights about photography, the gear and what it all means to me. I'm not sure if this site will make anyone besides myself a better photographer but I figure it's worth a try. Take a look around and let me know what you think. Thanks for stopping by!

Subscribe

Recent Posts

Categories

Pages

Flickr Friends

Links

My Sites

Archives