Take better sunset pictures

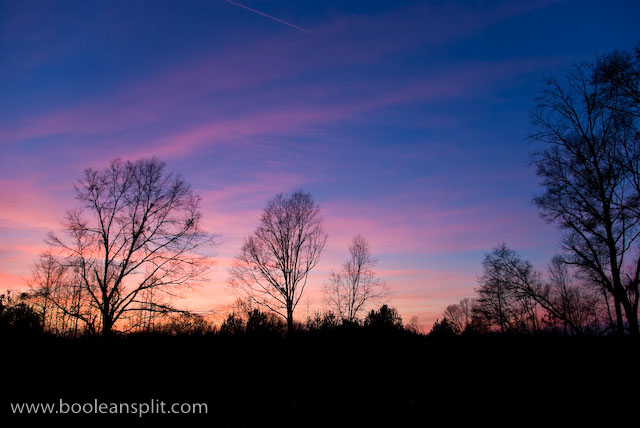
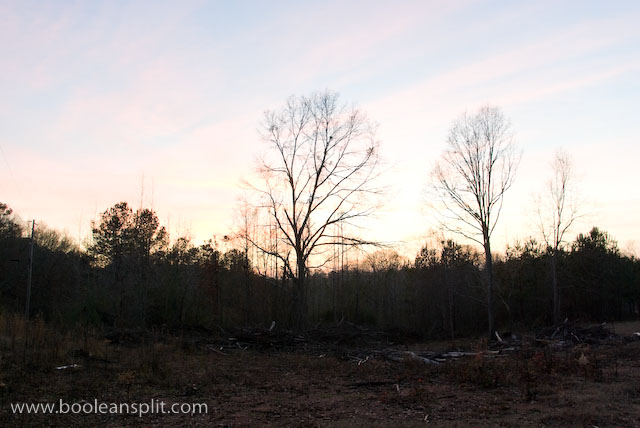
There are few things more beautiful than a good sunset or sunrise photograph. However, if you’ve ever tried to do it you know it can be frustrating. How many times have you seen a beautiful sunset like the one above only to have your photo turn out something like this?

There are a couple of easy things you can do to get great sunset photos. First, turn off your flash. The only thing the flash is good for during a sunset is to add fill to illuminate a foreground subject. Unfortunately, getting the right mix of fill flash and background exposure can be very tricky:

Not a very inspiring photo (though after the number of rum punches I had I didn’t care). For now, let’s just turn the flash off and focus on capturing a brilliant sunset photo.
Next, set your white balance to auto. You can also try daylight but I have always found the auto setting gives the best mix of deep blues, pinks, reds and oranges.
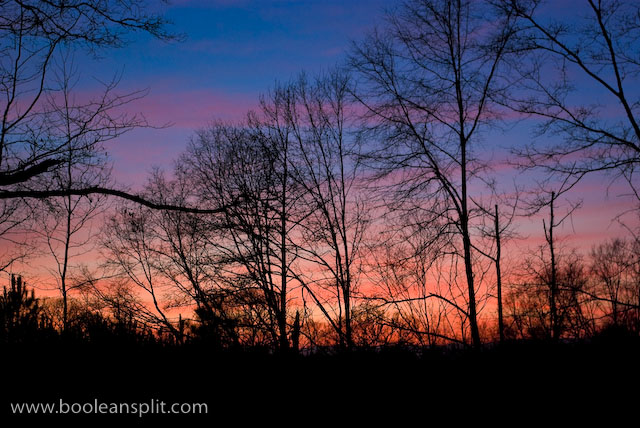
I like to shoot sunsets with a wide angle lens to get as much of the sky in the picture as possible. This ensures a full mix of colors from the darkest indigo blues overhead to the brightest pinks and oranges at the horizon. Usually I leave only a strip of ground/foreground across the bottom to anchor the photo- letting the sky dominate the scene for maximum impact.
The main challenge with sunset photos is getting around the camera’s matrix metering’s natural tendency to balance exposure across the frame. The camera doesn’t know what’s going on and tries to balance the dark foreground with the bright background. The washed out example at the top is what you get when you just point-n-click. To get a decent sunset exposure you either need to dial in some negative exposure compensation (usually -2/3EV to -1EV). An easier method is to just aim the camera at an unobstructed portion of the sky, focus, lock exposure, recompose, and shoot. I typically use a little of both.
For the best sunset photos I typically like to wait for the sun to be fully below the horizon. That beautiful glowing orange ball of the sun absolutely wrecks exposure on a camera and typically results in pretty disappointing shots. Also, some cloud texture in the sky helps provide a good mix of colors. Be sure to look behind you as many times clouds away from the setting sun pick up some awesome colors. Finally, some good foreground silhouettes can help add additional visual interest (especially helpful if the sky itself is not as dramatic as it could be).

A medium aperture like f/8-f/10 is best to ensure the best detail and sharpness across the frame and eliminate vignetting typical at larger apertures when shooting at a wide zoom setting. Since I generally like to wait for the sun to drop fully, there’s typically not very much ambient light. This means I either need to be shooting on a tripod at a low ISO and slow shutter speed or bump the ISO up to prevent camera shake. These samples were all shot hand-held at ISO 200-400 and f/8 and f/10 at around 1/4 second. The combination of the K10D’s in-body IS and the wide focal length meant it only took a few tries to get sharp shots (wider zoom angles can be hand held at slower shutter speeds than longer ones).
Typically a properly shot sunset photo doesn’t require much post-processing. Since I shoot everything in RAW I have to tweak sharpness and saturation on all my photos in Lightroom. I can also play around with the white balance a bit to get the best pop from my images- though the as-shot (Auto) setting worked best for these images. Often I find the fluorescent WB preset works well for sunsets for some reason.
While a DSLR gives the most control over all of these settings, I have gotten wonderful sunset photos with a pocket camera by simply turning off the flash and using the focus, recompose and shoot method. Here is a collection of some of my other sunset photos on Flickr.
The most difficult part about getting good sunset shots is being at the right place at the right time with your camera. I hope this helps you get that great shot the next time that happens!


