booleansplit.com

photos, tips, tricks, and thoughts from an avid amateur photographer


Posts tagged DSLR

Take better sunset pictures
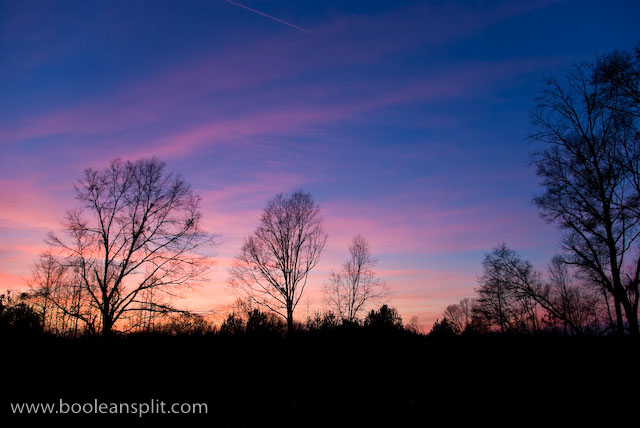
Alabama sunset

There are few things more beautiful than a good sunset or sunrise photograph. However, if you’ve ever tried to do it you know it can be frustrating. How many times have you seen a beautiful sunset like the one above only to have your photo turn out something like this?
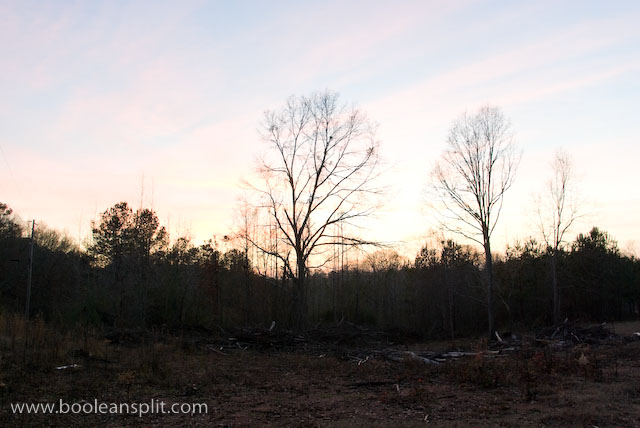
overexposed sunset

There are a couple of easy things you can do to get great sunset photos. First, turn off your flash. The only thing the flash is good for during a sunset is to add fill to illuminate a foreground subject. Unfortunately, getting the right mix of fill flash and background exposure can be very tricky:
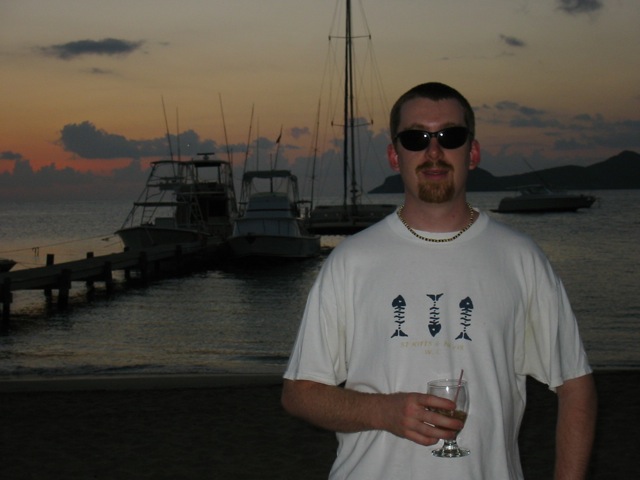
Nevis sunset flash

Not a very inspiring photo (though after the number of rum punches I had I didn’t care). For now, let’s just turn the flash off and focus on capturing a brilliant sunset photo.

Next, set your white balance to auto. You can also try daylight but I have always found the auto setting gives the best mix of deep blues, pinks, reds and oranges.

I like to shoot sunsets with a wide angle lens to get as much of the sky in the picture as possible. This ensures a full mix of colors from the darkest indigo blues overhead to the brightest pinks and oranges at the horizon. Usually I leave only a strip of ground/foreground across the bottom to anchor the photo- letting the sky dominate the scene for maximum impact.

The main challenge with sunset photos is getting around the camera’s matrix metering’s natural tendency to balance exposure across the frame. The camera doesn’t know what’s going on and tries to balance the dark foreground with the bright background. The washed out example at the top is what you get when you just point-n-click. To get a decent sunset exposure you either need to dial in some negative exposure compensation (usually -2/3EV to -1EV). An easier method is to just aim the camera at an unobstructed portion of the sky, focus, lock exposure, recompose, and shoot. I typically use a little of both.

For the best sunset photos I typically like to wait for the sun to be fully below the horizon. That beautiful glowing orange ball of the sun absolutely wrecks exposure on a camera and typically results in pretty disappointing shots. Also, some cloud texture in the sky helps provide a good mix of colors. Be sure to look behind you as many times clouds away from the setting sun pick up some awesome colors. Finally, some good foreground silhouettes can help add additional visual interest (especially helpful if the sky itself is not as dramatic as it could be).
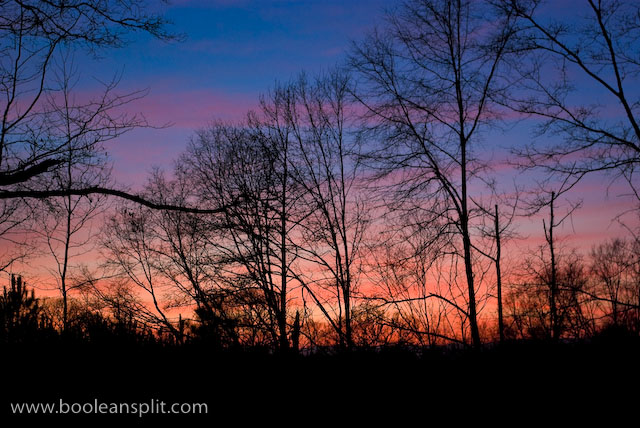
foreground texture sunset

A medium aperture like f/8-f/10 is best to ensure the best detail and sharpness across the frame and eliminate vignetting typical at larger apertures when shooting at a wide zoom setting. Since I generally like to wait for the sun to drop fully, there’s typically not very much ambient light. This means I either need to be shooting on a tripod at a low ISO and slow shutter speed or bump the ISO up to prevent camera shake. These samples were all shot hand-held at ISO 200-400 and f/8 and f/10 at around 1/4 second. The combination of the K10D’s in-body IS and the wide focal length meant it only took a few tries to get sharp shots (wider zoom angles can be hand held at slower shutter speeds than longer ones).

Typically a properly shot sunset photo doesn’t require much post-processing. Since I shoot everything in RAW I have to tweak sharpness and saturation on all my photos in Lightroom. I can also play around with the white balance a bit to get the best pop from my images- though the as-shot (Auto) setting worked best for these images. Often I find the fluorescent WB preset works well for sunsets for some reason.

While a DSLR gives the most control over all of these settings, I have gotten wonderful sunset photos with a pocket camera by simply turning off the flash and using the focus, recompose and shoot method. Here is a collection of some of my other sunset photos on Flickr.

The most difficult part about getting good sunset shots is being at the right place at the right time with your camera. I hope this helps you get that great shot the next time that happens!

DIY Pentax DSLR cable release

[Originally posted on my personal blog on Oct. 8, 2008]

There are a number of resources out there for creating your own electronic remote shutter release for Pentax DSLRs with a 2.5mm remote port. I don’t use a remote very often as the 2 second self timer seems to work fine for 99% of my photos under 30 seconds. However, longer bulb exposures require a remote. So, I picked up a generic cellphone headset at the dollar store and wired it up to a toggle switch I had laying around. (It seems this design also works for Canon Digital Rebel cameras with 2.5mm remote ports.)

There are 3 wires inside one of these cables: white, red & black. (Four conductor versions will not work with a Pentax so make sure the 2.5mm plug has 2 silver bands and not 4). All I did was cut the cord, strip back the outer jacket to expose the 3 conductors then plugged it in to the remote port on the camera and shorted the red and white wires to the black one to figure out which controlled what function on the camera. In this case the white wire triggered the shutter and the red caused the camera to auto focus. I connected the white wire to one side of the toggle switch with a small acorn nut and the black to the other side. I drilled a couple of holes in an old pill bottle to make a housing for the assembly.

superior ergonomics of the pill bottle housing

In standard shooting mode flipping the switch to the “on” position releases the shutter. You have to return the switch to the “off” position to review the shot and take another (ie: the shutter only fires when the switch is in the “on” position). For bulb exposures you simply flip the switch to “on” to open the shutter then flip it back to “off” to close it. A momentary switch would facilitate non-bulb shutter releases but I found the toggle switch to be perfectly workable as long as you remember to turn it off after the shot. There’s no auto focus function with this set up but that’s not typically a concern for the long exposure shots I take as I usually manually focus anyway. You can add a momentary switch to the focus wire if that’s important to you. Also, you could wire in both a toggle switch and a momentary switch to the shutter release to make non-bulb shots more convenient.

1 minute exposure using DIY remote release switch

1 minute bulb exposure using DIY remote release switch

Typically I have seen these DIY releases installed in an old film canister. Seeing as how I haven’t shot film in about 10 years I didn’t have one handy and figured the pill bottle was a good substitute. All was good with the use of my $1 release during my first outing until I was stopped and questioned by a policeman while shooting long exposures in downtown Auburn, AL. Seems he was less concerned with my skulking around in shadows taking pictures and just wanted to know what was in the pill bottle :D

UPDATE:

Shot the family Christmas card photo today and needed a little more reach than the original 12″ cord provided. 50′ of old speaker wire from the garage and a couple of extra wire nuts and voila!

DIY Pentax cable release with 50' cord.

DIY Pentax cable release with 50' cord.

DSLR Bokeh Tutorial

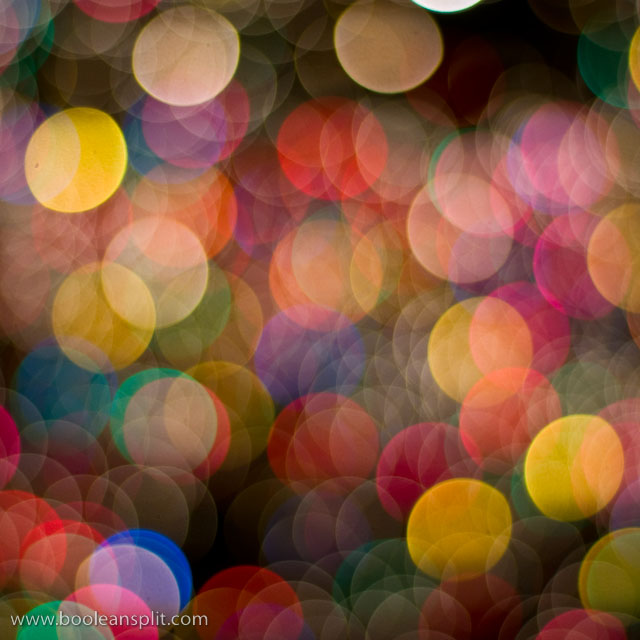
bokehpalooza

It seems that many Flickrites out there are struggling to get good bokeh shots. The good news is that shooting bokeh is one of the easiest photographic techniques to learn. Unfortunately, it is also one of the hardest to master. Here I will attempt to get you started with the basics. You’ll have to do the mastery part on your own :-)

Bokeh (pronounced: “boke-aay” or “boke-uh”- I prefer the latter) is the out of focus or blurry areas of a photograph. Wikipedia has a much more detailed description of the definition of bokeh that’s worth a read. On Flickr I find most people use the term to specifically describe out of focus highlights in a photo. For the purposes of this how-to we’ll focus (pun intended) on out of focus highlight bokeh.

The photo above made the Front Page of Flickr’s Explore last week. I wish I could say that this was a difficult and challenging shot that called upon all of my skills as a photographer. The truth is this was one of the easiest shots I took that night. These small aperture long exposure shots were a lot more difficult to get right:

The secret to shooting bokeh lies in its definition: out of focus highlights. You need three things to shoot bokeh: pin point highlights, a large aperture and a short focal distance. When I say pin point highlights I mean small light sources. Trying to shoot a large area of light like a window or fluorescent light does not typically produce the type of bokeh “balls” that we are looking for here. Small lights like Christmas twinkle lights are an obvious source, but any light source that is far enough away will become infinitely small and can produce bokeh. I find street and car lights in the distance at night make wonderful bokeh.

Pentax-A 50mm f/1.7 SMC

Next, we need a large aperture. For the novice, the aperture is the opening in the lens that controls the amount of light that makes it through the lens and shutter to the film/sensor. The smaller the f number (or f-stop) the larger the opening. This is usually expressed as f/5.6, f/4, f/2.8, f/1.4, etc. Read more about aperture here.  Typically the larger the aperture the larger the bokeh. Fast lenses below f/2.8 like my 20 year old manual focus Pentax-A 50mm f/1.7 SMC are ideal for shooting bokeh (and is the lens I use for most of my bokeh shots on Fickr).

That is not to say that one can not get great bokeh using lenses with a smaller maximum aperture like the typical kit lenses sold with most entry level DSLRs. The trick is to make sure you are using the largest aperture possible (smallest f number). To do this I recommend switching your camera into Aperture Priority mode (typically labeled “A” or “Av” on the program mode dial) and dialing in the smallest f number possible. With most kit lenses this will be f/3.5. Here is another Explore bokeh photo of mine shot with my kit lens at f/3.5:

The other reason that you want the largest possible aperture your lens is capable of is to ensure that your bokeh is round and not faceted. You see, most lenses use 5-7 straight aperture blades to create the variable opening in the lens. Bokeh takes on the shape and size of the lens opening so smaller apertures will produce smaller, faceted and generally less pleasing bokeh. There are exceptions to this rule as most high end lenses use curved aperture blades that keep the aperture opening round at all f stops. However, if you’re shooting with a $1,500 Canon L series lens I trust you already know how to shoot bokeh ;-)

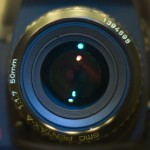
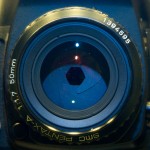
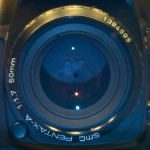
Aperture openings on a 6 bladed lens (mouse over for setting):

f/1.7f/5.6f/22

Bokeh shots at different aperture settings with this lens (mouse over for setting):

f/1.7 bokehf/4 bokehf/8 bokeh

The last component to getting good bokeh shots is the focus distance used. I have found that the shorter the focus distance to the foreground subject, the better the background bokeh I will get. The idea is to get as much distance between the subject and the bokeh producing highlights. Also, the closer you are focused to the camera the shorter the depth of field (DOF) will be. This ensures those lights way off in the background will be nice and blurred out.

The focal length of the lens is also a consideration. Depth of field is basically a function of focal length, distance to subject and aperture. At a given aperture and distance longer focal lengths result in shorter DOF. A short DOF is what we need to effectively blur the background highlights to produce bokeh. Getting close to the foreground subject and zooming to the longest setting on your lens will likely put you where you need to be to capture killer bokeh.

Here we have an example of close focus on the foreground subject coupled with a wide open aperture and longer focal length to create bokeh from small lights in the background:

When I took this shot I was at the minimum focus distance for my 50mm 1.7 lens (about 18-20″). The white (gold colored here) twinkle lights were on another Christmas tree approximately 8-10′ behind the light bulb and branch I focused on. The other smaller colored bokeh highlights were from other lights on the same tree that I focused on.

TUTORIAL:

Now that I’ve rambled on ad nauseam about all the intricate details of capturing bokeh, let’s get on to the part where you actually go do it!

For DSLR users (point ‘n shooters will have to wait for another tutorial):

  1. Set your camera to Aperture Priority mode (A or Av on the program dial).
  2. Select the smallest possible aperture (f) number for your lens (should be ≤f/4).
  3. Switch your camera to manual focus and manually adjust the focus to the closest setting.
  4. Zoom your lens to somewhere around 50mm.
  5. Find some nice points of light at a distance of 10′ or greater from the camera (your Christmas tree is the perfect subject this time of year).
  6. Fire away!

If you get a shutter speed that’s too slow (ie: less than 1/30 second), try bumping the ISO up to 400 or more. If you do the Christmas tree thing what you should get is something like this:

Depending on how dark the background is (darker usually = better) you might have to dial in some exposure compensation to get your bokeh to really pop. This image looks like it came out fine without any, but I often have to dial in +2/3 to +1 EV for my 50mm 1.7 on my Pentax K10D.

Next, try putting a subject of some sort in front of the camera at the minimum focus distance (or there about) with the bokeh highlights in the background. It’ll take a little playing around with subject matter and lighting (both foreground and background) but in no time you should be shooting bokeh like a pro! For more examples, be sure to check out my bokehliscious set on Flickr.

Please let me know in comments if this is helpful to you and/or if you have any questions or suggestions. Also, feel free to post links of your bokeh attempts for everyone to enjoy. Thanks for stopping by.

Happy bokeh-ing!

UPDATE: This is my single most popular post on my blog. Please let me know what else you would like for me to share about bokeh!

About

I'm an industrial designer and an avid hobbyist photographer. People are always asking me "how'd you do that?" So, I decided to create this site as a place to share my experiences and insights about photography, the gear and what it all means to me. I'm not sure if this site will make anyone besides myself a better photographer but I figure it's worth a try. Take a look around and let me know what you think. Thanks for stopping by!

Subscribe

Recent Posts

Categories

Pages

Flickr Friends

Links

My Sites

Archives