Memory card conundrum
My first digital camera was a Nikon Coolpix 950 bought in 1999 for around $1,000. It came with an 8MB compact flash card. I soon upgraded to a 64MB card for close to $300. It used to be that the cost of memory cards for digital cameras was an important deciding factor in the camera purchase. One of the primary deciding factors in my move from the Nikon 950 to an Olympus E-10 two years later was its ability to use my growing collection of CF cards. However, by the time I traded up to my Canon Rebel XT in 2005 memory card prices had begun to fall while capacities rose and I found my collection of random 48-512MB CF cards replaced by a single 4GB model.
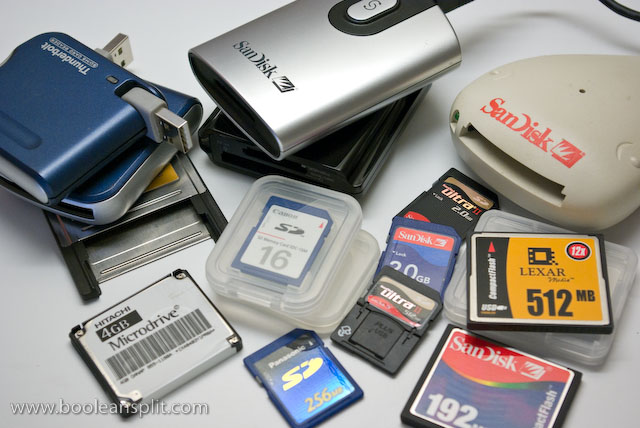
Flash forward to today and the collection of CF and SD cards and readers seen above is what I have left collecting dust in my desk drawer. When I made the jump from the Rebel XT to a Pentax K10D in 2007 I also made the jump from CF to SD memory. Since then I have once again made the jump to CF memory (during my all to brief stint with the awesome Canon 5D), over to Sony Memory Stick (for a not brief enough stint with a Sony DSC-H1) and back to SD (for my once again current K10D). All of this is a way of saying that I have had a bit of experience with memory cards over the years ;-)
Which brings me to the point of this article. With so many options available today, what’s the best solution? The simple answer is that there is no single solution that works for every photographer. However, there are a few things that I have learned that will make things easier for those of you just wading into this quagmire. So, wade into the following quagmire:
Card Format:
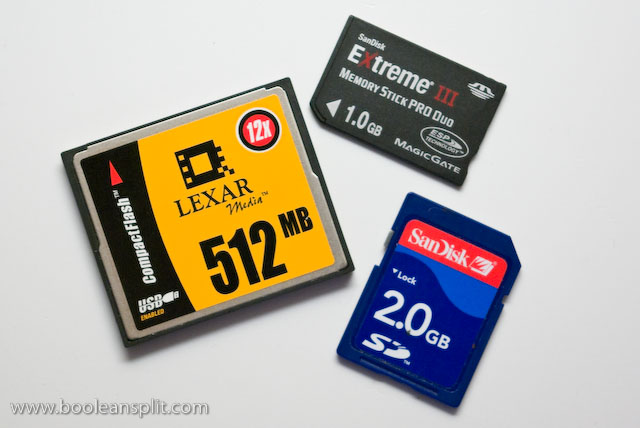
I’m talking about the physical form factor of the card, not the camera’s software format of the memory card. Your choices today are pretty much limited to Compact Flash (CF) and Secure Digital (SD). Sony’s Memory Stick (and all its various permutations) seems to be going the way of the Dodo with respect to their DSLRs. Here, the decision will be (or more likely has been) made for you as you pick the camera that works best for your needs.
In my experience Compact Flash is my favorite. They are easier to handle and more durable than SD. However, they require bulky card readers, can be more expensive than similar capacity SD cards and are becoming harder to find as camera makers move towards the smaller SD format as cameras continue to shrink.
SD cards are very small which makes them highly portable (and easy to lose). The main advantage of SD cards is that they do not have the multitude of tiny pins on the device side like CF cards do. These are easy to bend if one is not careful. SD cards may require a bit more attention to ensure proper orientation when inserting them into a device, but their spring contacts are more durable in the long run. One other thing of note: SD cards generally have a sliding lock switch. This is handy if you want to secure your data, but a hassle when you inadvertently lock your card inserting it into your camera.
As of this writing, Amazon is selling a SanDisk Extreme III 4GB CF card for $32.02 while the equivalent SanDisk Ultra III 4GB SD card can be had for only $19.93. That kind of percentage price difference would have been a big deal 10 years ago but today it’s not such a big deal. BTW, a SanDisk Extreme III 4GB Memory Stick Pro-HG Duo runs $58.21. Yikes!
BTW, be sure to format any new card you buy with your camera. Doing so periodically (monthly) will help prevent card corruption and lost images while clearing up miscellaneous files that tend to collect and take up storage space.
Capacity:
This one’s simple. The typical hobbyist DSLR owner should shoot 2-4GB cards. Sure, 8-16GB and even 32GB cards are common and likely within easy reach of most people. However, I can fit around 122 RAW (PEF) images on a 2.0GB SD card with my 10MP Pentax K10D. Switching to high quality full-size JPEGs that number bumps to 410. If I drop the JPEG size to 6MP I get 688 at the high quality setting.
If I was shooting a 16GB card I could likely fit nearly 1,000 RAW images on a single SD card. I personally have never been in a situation where I needed (or wanted) to have 1,000 images on a single postage stamp sized memory chip that could easily be lost, stolen, corrupted, dropped in my coffee (don’t ask), and/or overwritten. I figure it’s safer to shoot in smaller batches and download to the computer more often. When I travel I carry multiple 2GB cards in my bag for back up in case one gets full. I also will often switch to 6MP JPEG mode for the more snap-shotty type travel pictures. The only people who really need the largest capacity cards are professionals and people traveling to far flung places with no computer access (like Nevis or the South Pole).
Speed:
CF and SD cards come in a wide variety of speeds. These are often expressed in terms of “20x”, “50x”, “133x”, etc. or more helpful “15MB/S”, “30MB/S”, etc. My Flickr friend Jim sent me this link to Rob Galbraith’s great website that scientifically tests the most popular cameras’ speeds with all the latest memory cards. Check out the site, find your camera and see what you find. Most likely you will see that the latest highest speed cameras perform the best with the latest high speed cards. However, you will also find that older slower cameras do not directly benefit from using the fastest cards. My advice, do a little research on this site then buy the fastest card you can justify. If you dig around a little on Rob’s site you’ll find his tests of card readers. This is where the cards’ speed will pay the most dividends for most people. More on that later.
One emerging area where memory card speed becomes increasingly important in the latest DSLRs is video capture. With new cameras like the Nikon D90 and Canon 5D MK II now able to capture full HD video, memory card speed is critical to their performance. If you have one of these cameras be sure to check the manufacturers’ recommendations for memory cards and follow their advice.
Brand:
I recommend you stick to the top name brands like SanDisk, Lexar, Kingston, and PNY. You may pay a little more than the no-name discount and/or “house” brands but that’s because the larger name brand companies have a lot more to lose if their cards fail. If you follow my advice on speed you’ll be buying the name brands’ higher end cards to get the best speed. There are some “Professional” cards available but unless you can verify that there is a specific performance/dollar advantage don’t spend the extra money. One “Pro” CF card I saw at Best Buy was 2X the price as a regular card of the same speed and capacity from the same company. Turns out it came bundled with some kind of crappy image data verification and cataloging software that I would have never used. This came across to me as nothing more than preying on the prosumers’ desire to shoot “professional” gear.
Card Readers:
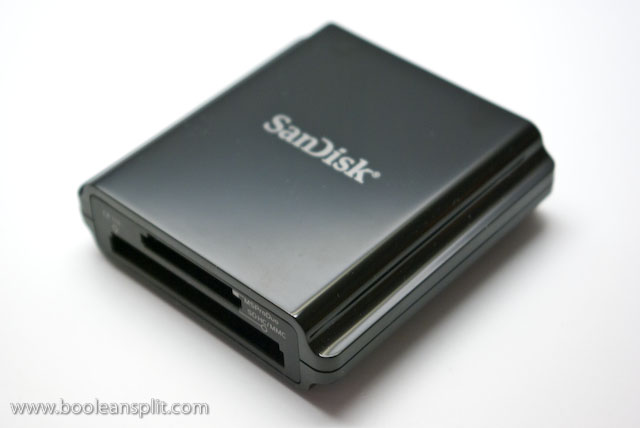
Now that you’ve settled on a memory card, do yourself a favor by stashing the twisted up USB cable that came with your camera in that drawer where all your old electronics go to die and pick up a card reader. Very few digital cameras can come close to matching the transfer speed of a good external card reader. As a bonus, you’ll save your camera’s battery by giving it a rest during transfers. The SanDisk Extreme III USB 2.0 3-in-1 reader above was one of the fastest USB readers you could buy last year. Now they have changed the design to CF only but at less than $20 it represents a great value for CF shooters.
For Mac users you can get the best speed via FireWire 800 readers. Unfortunately, Apple’s support of this format that they gave life to seems to be waning. Personally, I’d stick with USB 2.0 unless you have a Mac with FireWire 800 you’re planning on keeping for a while.
USB SD card readers are a dime a dozen and they all seem to work pretty well. Again, stick with a name brand and all should be well. I like a cable attached design for desktop use and a thumb drive style for portable use. Also, if you’re an iPod user check out this product I created while at Griffin Technology. The Griffin Simlifi combines an iPod dock with a USB 2.0 hub and both CF and SD card reader slots. It’s not the fastest card reader out there but can really clean up the cable clutter on your desk. Plus, it features an actual aluminum case that I sweated many months over :-)
Another option for laptop users is a PCMCIA or ExpressCard reader. These adapters are a bit more pricey and can only be used with certain combinations of laptops and memory cards. However, they represent an extremely fast input interface to your machine (up to 480MB/S both ways) and are extremely convenient (especially if you just leave it in your machine). Sticking with a reputable brand name here is critical as I have run across low quality Asian versions that are not properly developed. When I was at Griffin Technology I convinced them to bring in an ExpressCard 34 SD adapter for use with the then new MacBook Pros. We were on track to be first to market with this product when we discovered that our vendor had fouled up the firmware on the first batch of readers preventing the computers they were in from going to sleep when the lid was closed. Griffin’s product finally made it to market and works great but Belkin, SanDisk and others got the retail slots which fatalistically limited production to a single order.
I’d steer clear of desktop built-in expansion bay options as they are not any faster than USB 2.0 options and have been known to have all manner of driver-related issues (particularly on Windows machines).
Bottom line on readers: make sure whatever you choose is USB 2.0 (or FireWire 400/800) compatible. If you end up with a USB 1.0 device you’ll be kicking yourself over the s-l-o-w downloads!
Conclusion:
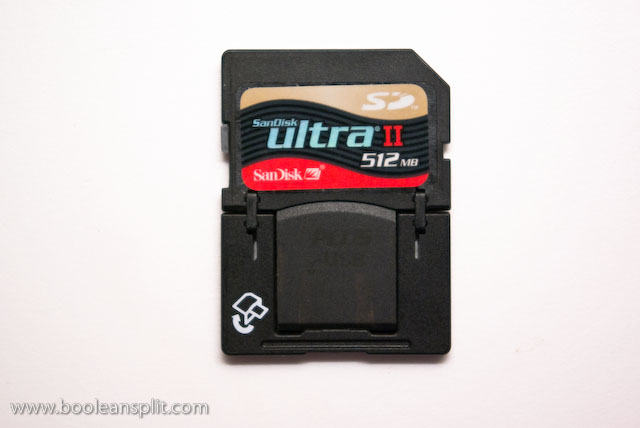
Hopefully by now you are now fully armed with the basics needed to wade through the morass that is memory card-dum. The SD card above has been my card of choice since it came out a couple of years ago. It’s the SanDisk Ultra II SD Plus with USB and it breaks open to reveal a built-in USB connector. This completely eliminates the need for an external card reader! This is an extremely innovative solution that unfortunately seems to have not gained enough traction in the market for SanDisk to update. They are still available on Amazon but growing scarce. Here’s a couple of shots of one in use with my MacBook Pro:
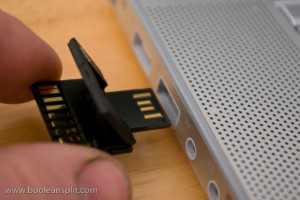
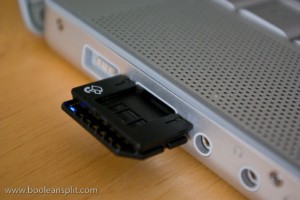
Unfortunately, these Ultra II cards top out at 15MB/second transfer. Now that I’m back to toting around a MacBook Pro with an ExpressCard slot I think I may switch back to my ExpressCard 34 reader and upgrade to a 30MB/second SD card like this SanDisk Extreme III SDHC 4GB card.
If I was still shooting a Canon with a CF card I’d likely be taking a strong look at this Delkin SD to CF adapter so I could still make either my SanDisk SD Plus cards or a newer Extreme III card + ExpressCard 34 reader work. They do make ExpressCard 34 Compact Flash readers but since a CF card is wider than the ExpressCard 34 slot, they leave a nasty tumor hanging out of the MacBook Pros’ sleek 34mm slot.
Hope this helps. Please let me know if I missed anything or if you have any specific questions.
BTW, all the “studio” shots for this post were shot on my kitchen counter DIY whitespace studio.
