booleansplit.com

photos, tips, tricks, and thoughts from an avid amateur photographer


Posts tagged K200D

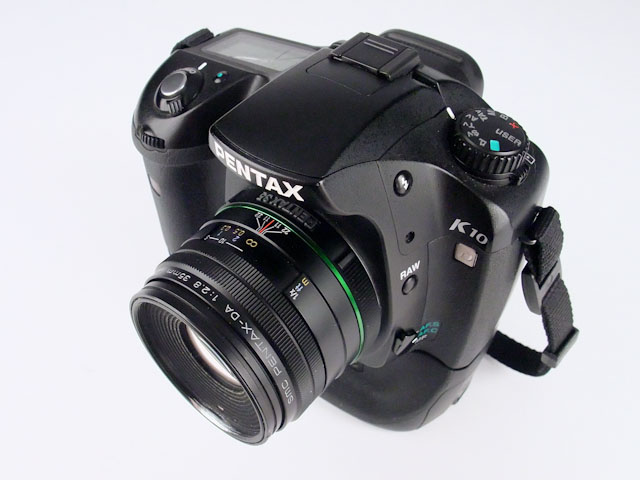
Pentax SMCP-DA 35mm f/2.8 Macro Limited User Review

money1

Ever since I started shooting DSLRs with APS-C sized sensors I have struggled to find the perfect go-to lens for the majority of my photos. I love the speed and image quality of my old A series 50mm f/1.7 but the lack of autofocus and relatively tight F0V (75mm equiv.) makes it less than ideal for a lot of my shooting. When my friend Stephen said he was sending me his DA 35mm f/2.8 Macro Limited to take for a spin I was pretty sure that it was going to be the lens I have been looking for. I had read all the reviews so I knew that it was a sharp lens with top-notch build quality. All that remained was for me to live with it for a few days…

Pros:

  • Razor sharp starting at f/2.8.
  • Virtually no flare and very low CAs or fringing.
  • Wonderful bokeh (especially during macro use).
  • Impeccable Limited build quality.
  • Smaller and lighter than most 1:1 macro lenses.
  • Durable*
  • Ultra close focusing capability.
  • Built-in lens hood.
  • Excellent bang-for-the-buck.

*I didn’t test this lens’ durability but my friend Stephen did. Within minutes of opening the box he dropped it from a height of 1M onto concrete. The filter mount ring took the brunt of the impact (note silver filed away area in these shots) but the function of the lens was not otherwise affected. Wow!

Cons:

  • Slow focusing due to extremely long focal range.
  • Lack of focus limit switch (might correct previous point).
  • Focus ring spins during autofocus operation.
  • Included lens cap falls off too easily.
  • Extremely limited stand-off distance at 1:1 magnification (read: “none”).
  • Diffraction may be a problem above f/8 with non-macro shots.

Conclusion:

Turns out this is not the do-it-all lens I’ve been looking for. Now, before all you Pentaxians out there start accusing me of bashing Pentax again, let me explain…

The DA 35mm f/2.8 Macro Limited is one of the best macro lenses I have ever used. It absolutely blows everything away within 2 feet of the front of the lens. I love the natural look the 35mm (52.5mm equiv) FoV provides. I can easily see this being one of the best lenses available for shooting products in a studio setting. If I were still walking the floor at Asian electronics trade shows it would be my go-to lens (lots of close-up shots of products held in my hand). However, the things that make this lens so good at what it was designed to do also make it less than perfect for my everyday use. If your primary interest is up-close hand-held macro photography, look no further. Buy this lens. If, like me, you are thinking that this lens might double as a good medium focal length lens for everyday use, please read the rest of my review and decide for yourself:

More »

Pentax BG2 battery grip user review

dsc_0001-1

The photos for this review were hastily shot with a borrowed Nikon D40. Some of the shots were taken left handed and upside down. I apologize in advance for any lackluster image quality ;-)

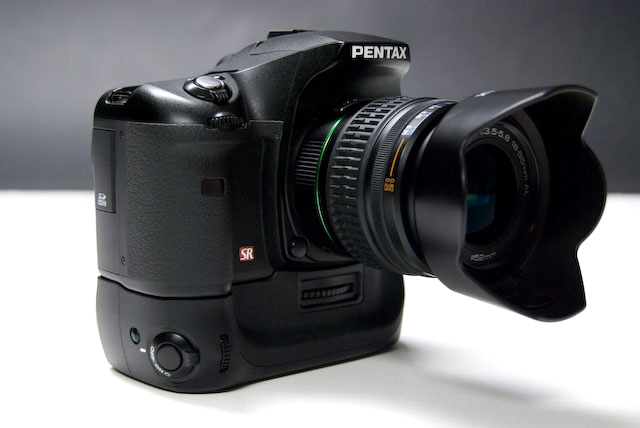
I have typically resisted battery grips for my DSLRs because I felt that they weren’t worth the extra bulk. There have only been a half dozen times in my the past 5 or 6 years that I actually drained a fresh battery while shooting. Even then, I just pulled a back-up battery out of my bag/pocket and kept on shooting. My K10D routinely gets 200-300 shots out of a charge so I haven’t even bothered to pick up an extra battery. After playing around with a Nikon D3 and a Canon 1D Mark III (both cameras with built-in vertical grips) I was struck by how much better these cameras felt in my hand- despite their heavier weight. In preparation for heading out to the PMA show I decided to pick up an extra battery. While I was shopping I discovered Cameta had a deal on Amazon for a BG2 battery grip + extra no-name battery for $139.95. This meant if I bought the grip I’d get the battery essentially for free. So I took the plunge. Here’s what I discovered:

Pros:

  • Vastly improves ergonomics, balance and stability of the camera.
  • Extra battery equals more shots between charges.
  • Ability to designate grip battery as the primary battery so it depletes first- leaving the in-camera battery as a back-up.
  • Redundant controls for vertical shooting.
  • Solid OEM build quality (weather sealed, too).
  • Does not require removal of in-camera battery and battery door like some grips do.
  • Nifty storage slots for extra SD card and Pentax IR remote.
  • Makes camera look more “significant”.

Cons:

  • Added weight (11oz).
  • Added bulk (may not fit in many bags).
  • Redundant controls are not placed identically to camera controls and do not function as well.
  • Tripod screw mount takes a few seconds to engage/disengage.
  • Vertical grip not as substantial as regular grip.
  • No AA battery option.

Conclusion:

Having used the grip for three days of walking around the Las Vegas Convention Center and a couple of days worth of my normal routine I can safely say that this is the best accessory I have purchased for my camera. Surprisingly, it’s not because of the extra battery life. The main advantage of the battery grip for me is the dramatic improvement in the ergonomics and handling of the camera. If you own a Pentax DSLR you owe it to yourself to pick one of these up (the K200D uses the BG3 grip). The improvements it makes are easily worth the $130. I actually believe that this is one of the only accessories that I have tried that can actually help improve the quality of your photographs by making the camera a more natural extension of your hand. If you have another brand of camera I can only assume that their battery grips will provide a similar improvement in the handling of your camera (though some are a bit more fussy to work with).

On to the pictures and details… More »

Pentax SMCP-DA* 16-50mm f/2.8 ED AL (IF) SDM user review

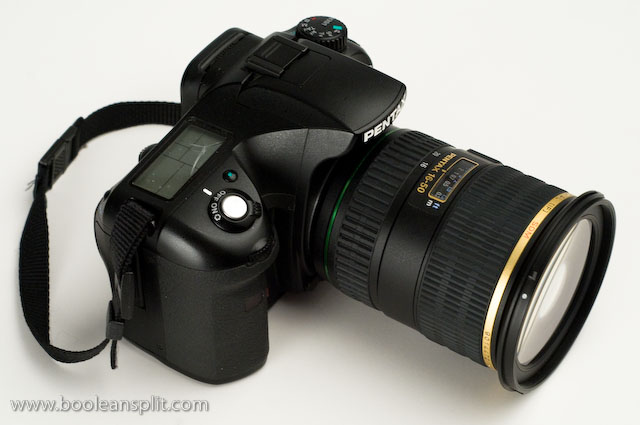
Pentax K10D + 16-50 f/2.8 DA*

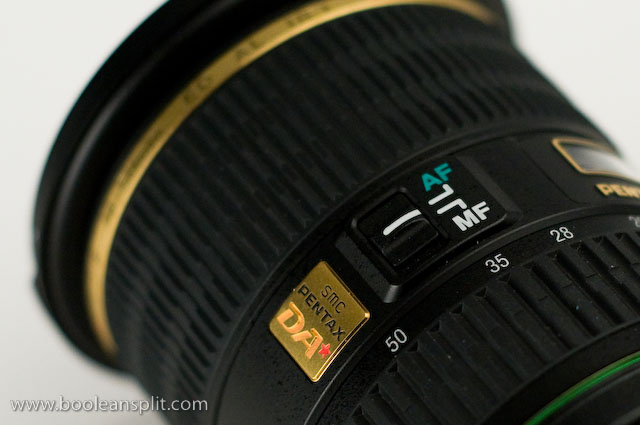
My friend Stephen loaned me his Pentax SMCP-DA* 16-50mm f/2.8 ED AL (IF) SDM lens so I could put it through its paces and compare it to my kit lens (SMCP-DA 18-55mm f/3.5-5.6 AL). If you don’t know already, Pentax’s DA* (”D-A-star”) line of lenses are their highest quality zooms. They feature very high quality construction, weather sealing, silent ultrasonic focus motors (SDM), and Pentax’s best SMC coatings (SP) to date. Retailing at close to $700 this lens seems like it should be a huge step up from the $99 kit lens.

This isn’t a technical review. If you want MTF and distortion charts go here. Instead, I’m just going to cover my observations during real world everyday use. Keep in mind that I do have a unique perspective here so take my opinions with an appropriate grain of salt. Here are my overall findings. Feel free to read on for a more in-depth look at how I formulated my opinions.

PROS:

  • Excellent build quality
  • Useful zoom range
  • Silent SDM focus motor
  • Weather seals
  • 9 bladed aperture

CONS:

  • Very soft around the edges wide open
  • Distracting CAs below f/4
  • Big and heavy
  • Very long for a 50mm lens
  • Pronounced barrel distortion at 16mm
  • Expensive

CONCLUSION:

While I would normally suggest upgrading the standard kit lenses from Canikon, Pentax has done an excellent job with their SMCP-DA 18-55mm f/3.5-5.6 AL and this gussied up DA* lens only helps to prove that point. Had I bought this lens myself I would have sent it back after the first day and put my money to better use. This is a big, heavy and expensive lens that does not prove a significant upgrade to the kit lens in everyday use. Get and/or keep the kit lens and put your money towards a dedicated ultra-wide angle lens and/or some fast primes to compliment the kit lens (some suggestions can be found at the end of this article).

REVIEW:

Pentax 16-50 f/2.8 DA* vs. 18-55 f/3.5-5.6 DA kit lens

Purchasing a lens for me encompasses four primary areas of concern: image quality, build quality, handling, and value. There is no standard order of importance here as all of these issues carry different weight depending on the intended application of the lens in question. In this case, the 16-50 seems ideally positioned as an upgrade to the standard kit lens. This makes it an all purpose lens that should perform equally well in all four areas while handily outperforming the kit lens (which is why I am comparing the two here).

100% edge crop

Image Quality

I think the crop above says it all. Shoot this lens at 16mm with anything less than f/4 and the color fringing (chromatic aberrations or “CAs”) and edge softness are quite disappointing. F/8 is required to eliminate the problem altogether from wide shots. The fringing persists all the way up to 50mm but is generally less of a problem at the longer focal lengths due to the shorter depth of field at f/2.8 (CAs get lost in the bokeh). Center sharpness is pretty good wide open (f/2.8) at all focal lengths and becomes tack sharp at f/4 and above. Overall color and contrast are very good (as it is with all Pentax lenses).

My biggest issue here is that the three main advantages this lens should have over the kit lens are sharpness, speed and the wider field of view (FoV). I found myself stopping down to at least f/4 for most of my shots with this lens, only using f/2.8 in extremely low light hand-held situations and when controlling the depth of field (DoF) was critical. The extra 2mm on the wide end (16mm vs. 18mm in the kit lens) are noticeable due to the greater FoV but more notably for the exaggerated barrel distortion. This isn’t a deal breaker for me but is disappointing at this price point.

On the other hand, stopped all the way down to f/22 and opened up wide to 16mm, this lens produces some very nice results for landscape photography. Its nine bladed aperture creates awesome 18 pointed starbursts with very little flare. This is one of the areas where the higher build quality of the DA* really shines (pun intended).

f/8 @ 16mm

That 9 bladed aperture also produces very nice bokeh even when stopped down. The image above was taken at 16mm and f/8 and exhibits very smooth blurring of the background with mostly circular out of focus highlights. This shot also illustrates the 16-50’s macro performance. It’s 0.3m (11.8″) minimum focus distance makes it pretty useful for getting in tight even if the 50mm maximum focal length doesn’t provide a tremendous amount of magnification. Keep in mind that the minimum focus distance of a lens is measured from the sensor (ie: film) plane in the camera body and not from the front of the lens. This means that at 50mm you can get up to about 3-4″ away from the subject with the front glass. This may be useful sometimes and a problem at others. Personally, I like shots like this where you get in close with the wide angle to exaggerate scale and perspective. Meanwhile, the kit lens can focus down to 0.25M (9.8″)…

Build Quality

Not much to say here. This lens is built as well or better than the best lenses from any mainstream manufacturer. One heft and you will not question its price tag. Typical to the DA* line, the 16-50 features gasketed seals to prevent dust and moisture penetration, including a seal at the lens mount to seal it to the camera body. Combined with Pentax’s weather sealing on the K10/20D bodies this makes for a very practical all-weather combination. I’m sure this is a useful upgrade but I have shot in some pretty nasty conditions with my kit lens and have not had any problems with moisture penetration. (I have to wonder if most non-professional photographers would put their cameras through the kind of abuse this level of construction suggets is possible). The zoom and focus rings are well damped and buttery smooth with nicely ribbed rubber rings. There is no slop or wiggle between the various moving parts anywhere throughout the zoom range.

Handling

For me this is one of the most conflicting areas for this lens. On one hand Pentax has included some very nice design features that make this lens a worthy step up from the kit lens. On the other hand, the sheer bulk of this lens really gets in the way. Here are a couple of the nicer design features:

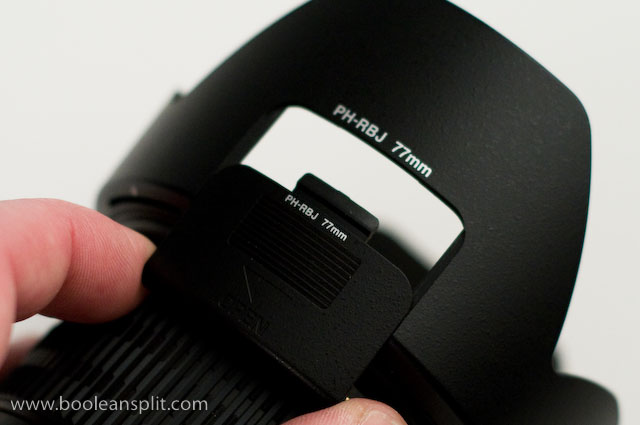
lens hood port

The access port on the lens hood is a nice touch common to all Pentax lenses. It allows access to the control ring on rotating filters without removing the lens hood (like polarized, graduated and special effects filters). This is a very user-friendly feature that all lens makers should adopt. After all, you usually find yourself needing to use these types of filters and the lens hood at the same time anyway, right?

SDM focus switch

Another nice feature of this lens is the SDM ultrasonic focus system. This lens focuses absolutely silently. This can be a bit strange at first considering how loud the screw drive focus system is with standard lenses. It’s not noticeably faster or more accurate than the screw drive system (still hunts too much IMO) but its silent operation draws less attention to the fact that you are taking pictures (if only the extra-loud shutter wouldn’t betray us so). The focus ring can be used anytime to fine tune the focus. However, it is not directly coupled to the focus mechanism so it does not stop turning when you reach the either end of the focus range. Pentax has included an AF/MF selector switch on the lens for those times when you want full time manual control. This is a lot easier to use than the switch on the camera body and is a nice touch.

DA* lens cap

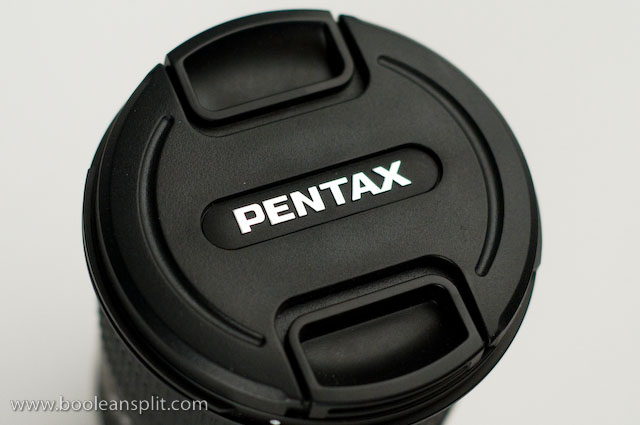
Why does Pentax make me spend $700 to get a decent center pinch lens cap?

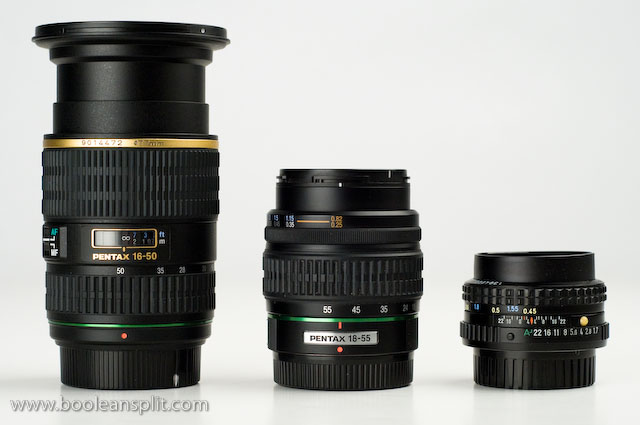
16-50 DA*, 18-55 DA & 50 mm f/1.7 all @ 50mm

Now for the bad news. This lens is a brick. On my kitchen scale the 16-50 weighs 20oz while the 18-55 kit lens weighs in at 8oz and my old 50mm f/1.7 is only 5 3/4oz. (BTW, the K10D body w/ battery weighs 28oz). I realize that there is a weight penalty to step up to f/2.8 in a zoom but, considering this lens’ lackluster performance at f/2.8, I really have to question the benefit here. I mean, why carry around all this glass if you’re going to be shooting at f/4 anyway?

Mounting this lens to the front of my K10D felt very awkward. The grip on the K10D is a bit shallow and hanging all that weight off the front of the camera made it very difficult to hold securely with one hand. I found myself carrying the camera by the lens and having to use two hands for most of my shots. (Adding a battery grip would help balance the camera and provide better leverage with the heel of your right hand). Don’t get me wrong. I don’t mind a heavy and expensive lens if the performance and application justifies it. (Canon’s EF 70-200mm f/2.8L IS USM is one of my all time favorites). Overall this did not prove to be a very good walking around combination. I find this interesting since this sort of everyday use seems to be the main focus of lenses in this zoom range.

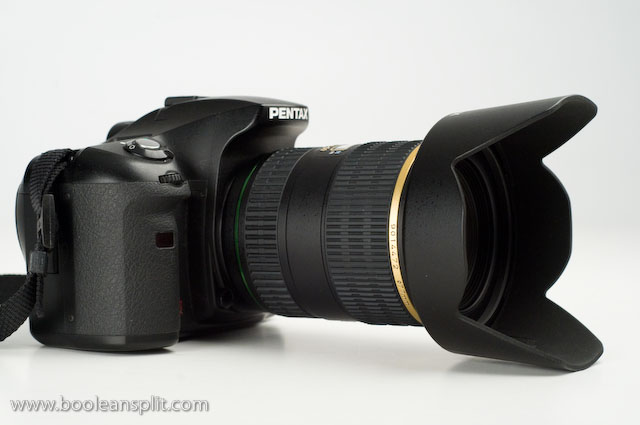
Pentax K10D with 16-50 f/2.8 DA*

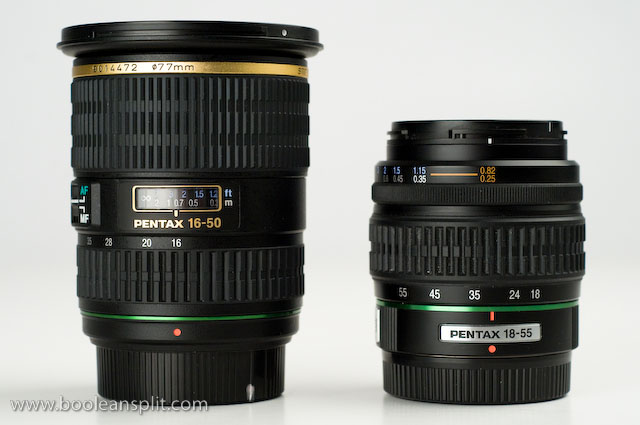
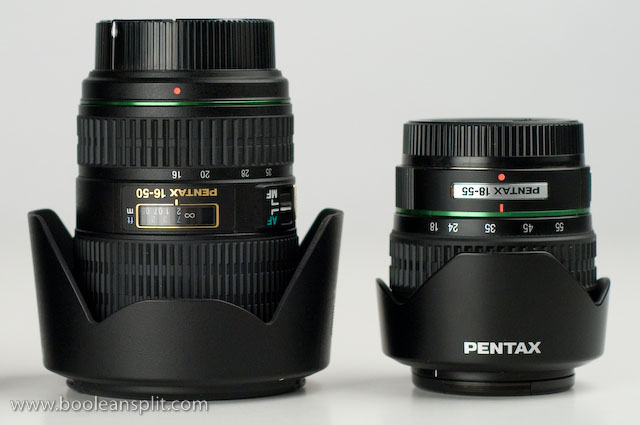
Another negative aspect the comparison photo in the section above illustrates is how long this lens is. The 16-50 is at its longest (5 3/8″ to the mount) at 50mm and its shortest (4″) at 16mm (as shown directly above with lens hood). The kit lens is only 3 1/8″ at its longest which is at 55mm and 18mm. As you zoom from 18mm to 55mm the kit lens starts off long then retracts to its shortest length of 2 3/4″ at 35mm then back out to 3 1/8″ at 55mm. This double action means it only has to extend half as much (percentage wise) as the 16-50 does throughout its zoom range. I point this out mainly because 50mm on a 1.5X APS-C sensor is the equivalent of 75mm on a full frame sensor and 35mm film. This puts it right in the sweet spot for close portrait photography. However, when you point this thing at people they tend to back away as if you’ve just aimed a bazooka at them. I imagine it would be fine in studio situations but for candids and street photography the kit lens (or better yet, a 50mm prime) is clearly the better choice.

16-50 DA* vs 18-55 DA

Not to belabor the point too much here, but another aspect that should be considered with respect to lens size is how much space it takes up in your bag. Here you can see the 16-50 f/2.8 DA* and kit lens both suited up for travel with hoods and caps. As you can see, the 16-50 will require a pretty massive hole in your bag (4 1/8″ X 4 7/8″). If you are anything like me you have to consider very carefully what goes in your camera bag. Which brings me to my conclusion…

The advertised advantages of this lens are its wide FoV (16mm), speed (f/2.8), SDM focus motor, build quality, 9 bladed aperture, weather sealing, and sharpness. However, in actual use I don’t find any of these things in combination to be a significant enough improvement over than the kit lens as to justify the price and bulk of the 16-50 f/2.8 DA*. In fact, if this were the kit lens I would be looking to upgrade. If you have $700 burning a hole in your pocket there are a number of better choices out there.

I suggest you look at the Pentax SMCP-DA 12-24mm f/4 ED AL (IF) ($670). It is a re-badge of the stellar Tokina 12-24mm f/4 AT-X 124AF Pro DX ($490) and makes a much more useful ultra-wide angle addition to the kit lens. (It is a bit frustrating that we Pentax users have to pay an extra $200 for the same lens the Canikon folks can get directly from Tokina). It is still pretty heavy (15oz) and will take up just as much room in your bag as the 16-50, but the ultra-wide angle shots you’ll get with this lens will absolutely blow you away. If speed and sharpness are what you are looking for pick up a fast prime or two like the Pentax SMCP-FA 50mm f/1.4 ($200) and/or the Pentax SMCP-DA 35mm f/2.8 Macro Limited ($480). If you really feel a burning need to try out a DA* lens, check out the new Pentax SMCP-DA* 200mm f/2.8 ED (IF) SDM ($890). Its bulk is easily justified by its extra reach and speed (just beware of some nasty purple fringing in high contrast scenes).

Finally, if you are buying a new Pentax body and are looking for an upgraded alternative to the kit lens, don’t. The kit lens is one of the best values available for these cameras. If you are determined, take a look at Sigma’s 18-50mm f/2.8 EX DC Macro ($420). This was the lens I originally bought with my first K10D back in ‘07. It is not nearly as big and heavy as the Pentax 16-50 f/2.8, has almost identical image quality, and adds a very useful macro focus capability across the entire zoom range. I shot several thousand shots with it in 2007 in several parts of the world and can attest to its quality. That being said, I now know that the Pentax 18-55mm kit lens makes better pictures ;-)

Some sample photos taken with this lens during testing.

UPDATE:

A number of readers have suggested that Pentax’s $380 SMCP-DA 16-45mm f/4.0 ED AL might be a better upgrade choice over the 16-50mm f/2.8 DA*. I have no experience with this lens so I did not mention it as an alternative. Reading over the photozone.de test report I can see that at only 12.9oz it is considerably lighter than the 16-50 DA*. Size wise it is slightly smaller than the 16-50 DA* with the added benefit of being at its shortest at 45mm (opposite of the 16-50). Also, it features an 8 bladed diaphragm which should result in decent bokeh and nice starbursts when stopped down. Resolution seems to be very good with distortion and vignetting similar to the 16-50 DA*. The only real noteworthy negative mentioned is heavy CAs at the edges of wide angle shots. If I can get my hands on one of these I will definitely post a similar review and find out if this lens is worthy of consideration.

After writing this review it was brought to my attention that the 16-50mm f/2.8 DA* has suffered from some quality control issues. It is entirely possible that this example is flawed. However, in researching this a bit more I still find a number of reviews pointing to similar image quality problems on lenses that are supposedly in proper working order. Potential QC problems aside, my opinion remains unchanged about this lens.

Pentax K2000 reviewed

pentaxkm

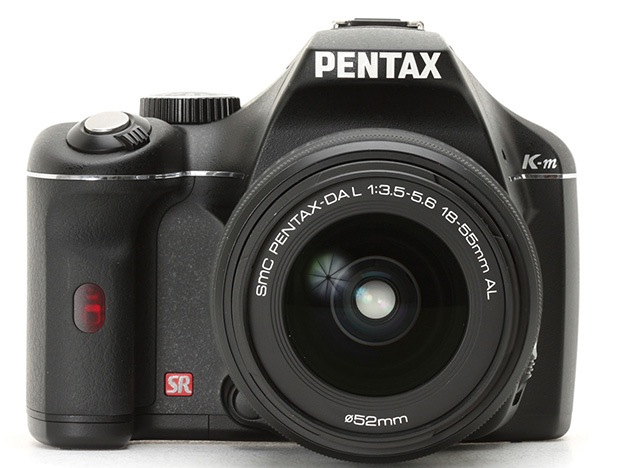
dpreview.com just posted their comprehensive review of Pentax’s latest entry-level DSLR, the K2000 (or K-m). Being a Pentax K10D owner I was excited to see the K2000 hit the market to go head to head with the entry-level Nikons and Canons. Unfortunately, it seems Pentax has taken a similar path as Canon did with their original Digital Rebel (EOS 300D). By simplifying the camera to appeal to novices, they have created a starter DSLR that most users will quickly outgrow.

While I understand this tactic from a business perspective (when users outgrow the K2000 they will theoretically upgrade to a K200D or K20D), it frustrates me as a photographer that Pentax would hamstring the K2000 in the ways they have (read the review to see what I’m talking about). Seeing as how one can pick up a K200D kit for less than $500 these days, I’d have a lot of difficulty recomending the K2000 to anyone. But that’s just me. Be sure to click over to the dpreview.com review and decide for yourself.

DSLR Bokeh Tutorial

bokehpalooza

It seems that many Flickrites out there are struggling to get good bokeh shots. The good news is that shooting bokeh is one of the easiest photographic techniques to learn. Unfortunately, it is also one of the hardest to master. Here I will attempt to get you started with the basics. You’ll have to do the mastery part on your own :-)

Bokeh (pronounced: “boke-aay” or “boke-uh”- I prefer the latter) is the out of focus or blurry areas of a photograph. Wikipedia has a much more detailed description of the definition of bokeh that’s worth a read. On Flickr I find most people use the term to specifically describe out of focus highlights in a photo. For the purposes of this how-to we’ll focus (pun intended) on out of focus highlight bokeh.

The photo above made the Front Page of Flickr’s Explore last week. I wish I could say that this was a difficult and challenging shot that called upon all of my skills as a photographer. The truth is this was one of the easiest shots I took that night. These small aperture long exposure shots were a lot more difficult to get right:

The secret to shooting bokeh lies in its definition: out of focus highlights. You need three things to shoot bokeh: pin point highlights, a large aperture and a short focal distance. When I say pin point highlights I mean small light sources. Trying to shoot a large area of light like a window or fluorescent light does not typically produce the type of bokeh “balls” that we are looking for here. Small lights like Christmas twinkle lights are an obvious source, but any light source that is far enough away will become infinitely small and can produce bokeh. I find street and car lights in the distance at night make wonderful bokeh.

Pentax-A 50mm f/1.7 SMC

Next, we need a large aperture. For the novice, the aperture is the opening in the lens that controls the amount of light that makes it through the lens and shutter to the film/sensor. The smaller the f number (or f-stop) the larger the opening. This is usually expressed as f/5.6, f/4, f/2.8, f/1.4, etc. Read more about aperture here.  Typically the larger the aperture the larger the bokeh. Fast lenses below f/2.8 like my 20 year old manual focus Pentax-A 50mm f/1.7 SMC are ideal for shooting bokeh (and is the lens I use for most of my bokeh shots on Fickr).

That is not to say that one can not get great bokeh using lenses with a smaller maximum aperture like the typical kit lenses sold with most entry level DSLRs. The trick is to make sure you are using the largest aperture possible (smallest f number). To do this I recommend switching your camera into Aperture Priority mode (typically labeled “A” or “Av” on the program mode dial) and dialing in the smallest f number possible. With most kit lenses this will be f/3.5. Here is another Explore bokeh photo of mine shot with my kit lens at f/3.5:

The other reason that you want the largest possible aperture your lens is capable of is to ensure that your bokeh is round and not faceted. You see, most lenses use 5-7 straight aperture blades to create the variable opening in the lens. Bokeh takes on the shape and size of the lens opening so smaller apertures will produce smaller, faceted and generally less pleasing bokeh. There are exceptions to this rule as most high end lenses use curved aperture blades that keep the aperture opening round at all f stops. However, if you’re shooting with a $1,500 Canon L series lens I trust you already know how to shoot bokeh ;-)

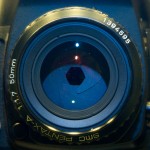
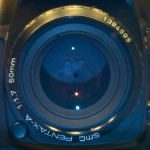
Aperture openings on a 6 bladed lens (mouse over for setting):
f/1.7f/5.6f/22

Bokeh shots at different aperture settings with this lens (mouse over for setting):

f/1.7 bokehf/4 bokehf/8 bokeh

The last component to getting good bokeh shots is the focus distance used. I have found that the shorter the focus distance to the foreground subject, the better the background bokeh I will get. The idea is to get as much distance between the subject and the bokeh producing highlights. Also, the closer you are focused to the camera the shorter the depth of field (DOF) will be. This ensures those lights way off in the background will be nice and blurred out.

The focal length of the lens is also a consideration. Depth of field is basically a function of focal length, distance to subject and aperture. At a given aperture and distance longer focal lengths result in shorter DOF. A short DOF is what we need to effectively blur the background highlights to produce bokeh. Getting close to the foreground subject and zooming to the longest setting on your lens will likely put you where you need to be to capture killer bokeh.

Here we have an example of close focus on the foreground subject coupled with a wide open aperture and longer focal length to create bokeh from small lights in the background:

When I took this shot I was at the minimum focus distance for my 50mm 1.7 lens (about 18-20″). The white (gold colored here) twinkle lights were on another Christmas tree approximately 8-10′ behind the light bulb and branch I focused on. The other smaller colored bokeh highlights were from other lights on the same tree that I focused on.

TUTORIAL:

Now that I’ve rambled on ad nauseam about all the intricate details of capturing bokeh, let’s get on to the part where you actually go do it!

For DSLR users (point ‘n shooters will have to wait for another tutorial):

  1. Set your camera to Aperture Priority mode (A or Av on the program dial).
  2. Select the smallest possible aperture (f) number for your lens (should be ≤f/4).
  3. Switch your camera to manual focus and manually adjust the focus to the closest setting.
  4. Zoom your lens to somewhere around 50mm.
  5. Find some nice points of light at a distance of 10′ or greater from the camera (your Christmas tree is the perfect subject this time of year).
  6. Fire away!

If you get a shutter speed that’s too slow (ie: less than 1/30 second), try bumping the ISO up to 400 or more. If you do the Christmas tree thing what you should get is something like this:

Depending on how dark the background is (darker usually = better) you might have to dial in some exposure compensation to get your bokeh to really pop. This image looks like it came out fine without any, but I often have to dial in +2/3 to +1 EV for my 50mm 1.7 on my Pentax K10D.

Next, try putting a subject of some sort in front of the camera at the minimum focus distance (or there about) with the bokeh highlights in the background. It’ll take a little playing around with subject matter and lighting (both foreground and background) but in no time you should be shooting bokeh like a pro! For more examples, be sure to check out my bokehliscious set on Flickr.

Please let me know in comments if this is helpful to you and/or if you have any questions or suggestions. Also, feel free to post links of your bokeh attempts for everyone to enjoy. Thanks for stopping by.

Happy bokeh-ing!

UPDATE: This is my single most popular post on my blog. Please let me know what else you would like for me to share about bokeh!

About

I'm an industrial designer and an avid hobbyist photographer. People are always asking me "how'd you do that?" So, I decided to create this site as a place to share my experiences and insights about photography, the gear and what it all means to me. I'm not sure if this site will make anyone besides myself a better photographer but I figure it's worth a try. Take a look around and let me know what you think. Thanks for stopping by!

Subscribe

Recent Posts

Categories

Pages

Flickr Friends

Links

My Sites

Archives