Yesterday I posted a tutorial on photographing bokeh with a DSLR. Today I am going to attempt to do the same about pocket cameras. Please take a minute to read over the first part of my DSLR Bokeh Tutorial to familiarize yourself with the basic concepts of what bokeh is and how it is typically created. The photo above (taken with my Pentax K10D & 50mm f/1.7 SMC-A lens) is the closest most people think you can get to photographing bokeh with a compact pocket camera ;-)
The truth is you can shoot bokeh with a pocket or “push here dummy” (PhD) camera, but there are a few things you need to understand about the way they work first so you can set the camera up and compose your shot properly. The two biggest hurdles for getting good bokeh shots on the typical pocket camera are the extremely small objective lens (and resulting small aperture) and the auto focus system. At this point I should mention that there are “pocket” cameras with manual controls. Users of these cameras will have to read both tutorials and combine steps and settings to find what works with their cameras.
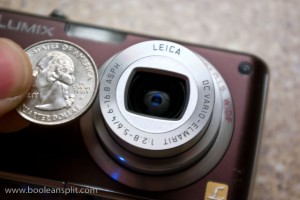
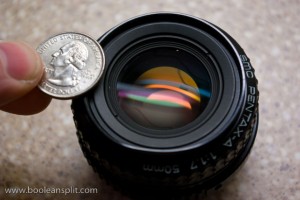
The first rule of bokeh is the bigger and rounder the aperture opening, the bigger and rounder the bokeh. The photos above do a pretty good job of illustrating the challenge facing PhD camera bokeh seekers. Also, since we don’t typically have control over the aperture setting used by the PhD camera, we have to be sure the camera is set up to give us the desired results.
The second challenge to overcome is the PhD camera’s fully-automatic-do-everything-for-you mindset. If you recall from my DSLR tutorial, to get good bokeh you need:
- out of focus pin point light sources in the background
- the largest possible aperture setting your lens will provide (f number)
- a medium to long focal length (zoom in)
- a short focal distance to the foreground subject
- significant distance between the foreground subject and background points of light
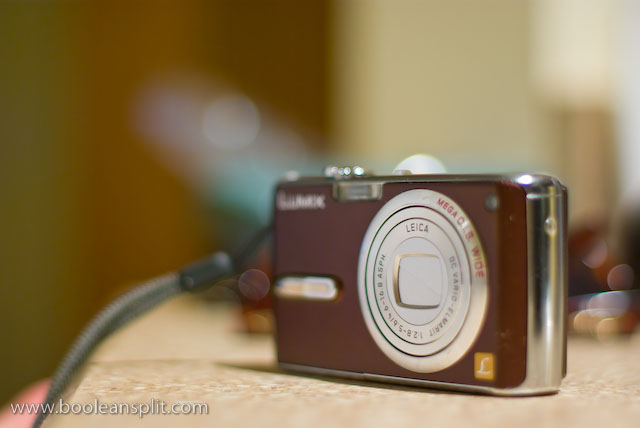
Trying to get all of this in combination at the same time can be very frustrating with a PhD camera. PhD cameras are typically programmed to produce photographs where everything is in focus and evenly exposed. To get decent bokeh out of your pocket camera you have to play a few tricks on it’s single-minded little silicon brain. I did a little playing around with the trusty little Panasonic Lumix FX07 above this afternoon to illustrate this tutorial.
TUTORIAL:
First, we need to set up the camera. Most PhD cameras come out of the box in full-on idiot mode. These “Auto” settings are great for taking snapshots but leave very little room for creative control. There is usually a “Manual” or other mode that allows greater control over the camera’s settings. I suggest that you use this mode for this exercise (and everything else). However, since there are so many PhD cameras out there (with each having its own user interface) I’m going to stick to settings that should be universally addressable. If you are unsure how to change any of these settings please refer to your camera’s user manual.
Step 1: Turn off the flash (IMO you’ll be a better photographer if you never turn it back on).
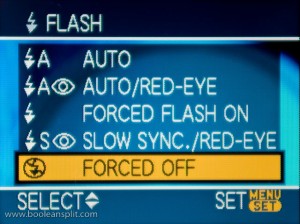
The PhD camera is going to try and fire the flash to fill in all the darkness between your bokeh balls. Not very helpful.
Step 2: Set the ISO to 200.
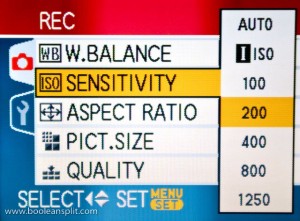
By forcing the camera to use a relatively slow ISO speed we ensure that the PhD’s brain will dial up the largest aperture opening to try and compensate for the lack of light while keeping the shutter speed as fast as possible.
Step 3: Turn on Image Stabilization (if available).
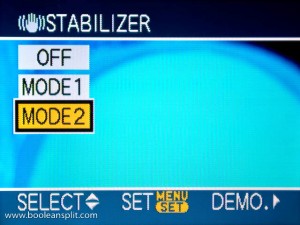
Image stabilization will help compensate for camera shake in what is bound to be a rather slow exposure. If you do not have IS you may have to play around with your ISO setting and/or use a tripod.
Step 4: Select MACRO focus mode.
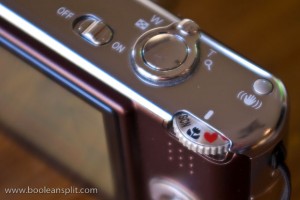
Macro focus mode will enable us to dial in a very short focal distance to maximize depth of field.
Now that the camera is properly set up you need some nice pin point sources of light. Again, a Christmas tree on the far side of your living room makes an excellent subject this time of year. As we have not yet decorated our tree, some Christmas tree lights on the kitchen counter will have to do for this tutorial. Remember the Golden Rule of tutorials: “do as I say, not as I do” :D
Step 5: Find some pin point sources of light in a relatively dark setting.

My Lumix has a 3X zoom but the macro setting only works in the widest zoom position so these series of shots are at the widest zoom setting. If your camera can still focus in macro mode within about 6″ of the front of the lens when zoomed out then try zooming out for this tutorial. Otherwise, just do what I did and play with the distance to the lights (I was only 4-5′ away from this small section of lights- 10-12′ is likely a better distance from a full-on Christmas tree).
Step 6: Focus on something small up as close to the front of the camera lens as possible (half press and HOLD of the shutter button only-do not take the picture yet).
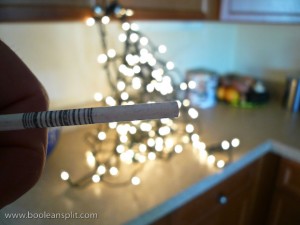
Here I’m using the stick from a Dum Dums lollipop. I like the sucker stick because it is small and white but its round shape provides enough highlight and shadow for the contrast detect auto focus to lock onto it. If you use your finger the camera will have difficulty focusing and the exposure will likely be blown out. Since PhD cameras lock exposure and focus at the same time, the trick here is to pre-focus on something very small in the foreground while not blocking too much light from the background and ruining the exposure of the bokeh.
Step 7: Move the foreground object from in front of the camera and fully depress the shutter button to take the picture.

Admittedly this has a lot to be desired as it has not reached the heights of bokeh-dom as are possible with a DSLR and large aperture lens. However, it is bokeh and it was shot with a PhD pocket camera. Adding a subject back into the foreground after pre-focusing on the small foreground object (using the LCD viewfinder to achieve focus by manually moving the camera and/or subject in front of the lens while continuing to hold the shutter button at the halfway point) can make for some pretty interesting bokeh shots that will impress your friends and neighbors (unlike this example).

Happy pocket camera bokeh-ing! Let me know how it goes.
UPDATE:
So, we finally got our tree up and I took the opportunity to try my technique out for reals. This is the best I could get with my Panasonic Lumix FX07:

Not bad, but I figured the limited macro capability of my Lumix might be holding things up a bit so I borrowed the wife’s 3 year old Canon PowerShot SD400. Canon PhDs tend to feature extremely close macro focus capability. Sure enough, the results this time around were really not half bad:

Merry Christmas!